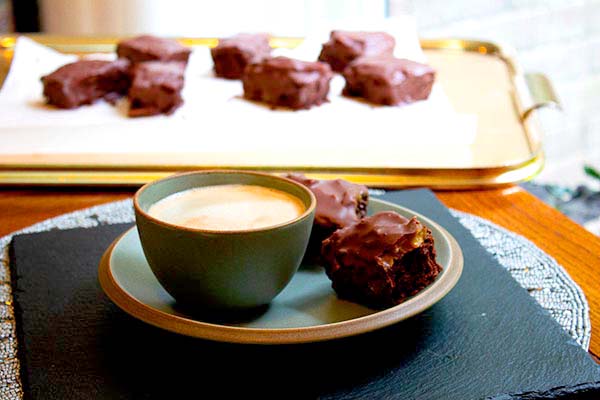
Flourless Caramel Chocolate Cake Bars, easy but messy to make, freeze well & are yummy
I really like Cadbury’s Caramel Chocolate Cake Bars. But they’re not gluten-free so I haven’t had them in years. I got a jar of Marks & Spencer’ salted caramel sauce. To me it tasted just like the caramel in Cadbury’s Caramel bars.
I got the idea to bake the flourless chocolate cake layers from the Black Forest Gateau as one, slice it into bars, top with the caramel sauce and cover in milk chocolate. Now, as I said I haven’t eaten actual Cadbury’s Caramel Cake bars in years, but to me this tastes like a good copycat. In any case these are really yummy. Covering them in melted milk chocolate is messy but, apart from that, this recipe is super simple. And these freeze really well. So you can make a batch and defrost one or more when you really want them.
I think any brand of salted caramel sauce will work great in these. Or you could use this lovely recipe for salted caramel sauce.
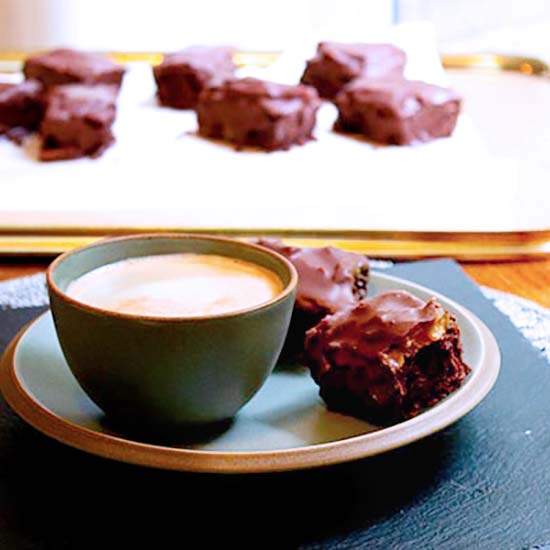
Flourless Caramel Cake Bars
Yield: Makes 10 bars
Suitable for: Gluten-free diet
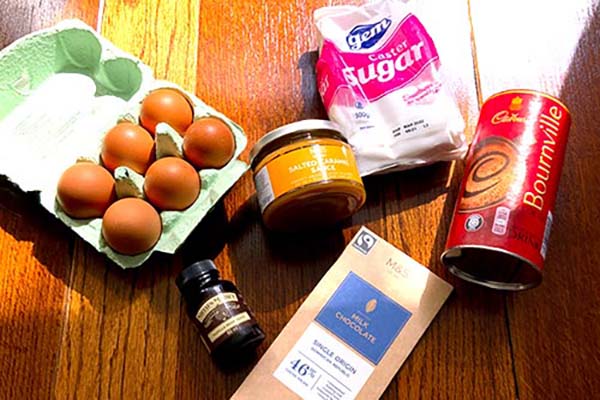
Ingredients:
- 6 large eggs
- small pinch of salt
- 150g caster sugar
- 45g cocoa
- 1 tsp vanilla bean paste
- ~150g salted caramel sauce
- 100g milk chocolate
Instructions:
Make the chocolate cake layer
Preheat the oven to 180° C. Grease and line a rectangular baking tin or dish. Separate the eggs into two different deep bowls. First whisk the egg whites with the small pinch of salt, until they form gentle peaks. In the other bowl beat the egg yolks, vanilla and sugar together in a large bowl until they have turned a pale buttery colour. Fold in a spoonful of the egg white to loosen the mix a bit. Next, sift in half the cocoa powder, and fold until it is all well combined. Fold in half the remaining egg white as this will make it easier to fold in the rest of the cocoa. Sift in the rest of the cocoa powder. Finally, fold in the rest of the fluffy egg white. Pour the cake batter into the greased and lined baking tin and bake for 30 - 40 minutes. The cake should rise to almost twice its height during baking. The top will be dry but still soft when it’s done. Take out and allow to cool in the baking tin for about 20 minutes. The cake will collapse during this time. Don’t worry this is normal. The cake will still be warm but no longer hot. Turn out onto a wire tray or grill and leave to cool completely. You do this so that the sponge will not be too moist for the bars. When the cake has cooled completely cut into rectangles. You can trim off the sides if you like - I do this.Cover the base of the bars with melted chocolate
Melt 60g of the milk chocolate. I use the microwave to melt chocolate. Break up the chocolate and place in a microwavable bowl. Cook for 30 seconds, take out and stir. Repeat until all the chocolate is melted. With the bottom of the chocolate bars facing up. Spoon about a teaspoon of melted milk chocolate over one of the cake bars. Spread the chocolate over the base and sides of the bar. Repeat this for each of the bars. If there’s a way to do this that isn’t messy, I’m afraid I don’t know it - but it’s totally worth it. Leave the bars on the countertop for the chocolate to cool and harden. In my cold flat, that takes about 1 hour.Add caramel layer and top with remaining chocolate
Turn over the chocolate bars so that the uncovered cake area is facing up. Carefully spread about a tablespoon of salted caramel sauce on the top of each bar. Melt the remaining 40g of milk chocolate and carefully cover the caramel layer of each bar with melted chocolate. Leave on the countertop for the chocolate to cool and harden completely. Once the chocolate has hardened you can store them in an air-tight container on the counter-top or in the fridge. But you can also freeze them. Just wrap each bar in baking paper. Place in the air-tight container, freeze and defrost bars as needed. They take about an hour or so to defrost on the counter-top.
Enjoy!